Monday, April 30, 2012
The Blog Post In Which I Confess My Slackness
Ok, I admit it. I am a slacker. I have been neglectful in maintaining not only this blog but also my make a week schedule. No excuses, I've just been too busy and/or too lazy, depending upon the week. I hope to make some headway in catching up soon, and have a commensurate number of makes for the number of weeks that have passed thus far this year. Fear not, Dear Reader! You shall have your hitherto tardy blog posts posthaste!
Sunday, March 25, 2012
Make 12: Red Wine Vinegar
Given that we've been making a lot of projects that involve fermentation, this one should come as no surprise. We use a lot of red wine vinegar for salads, etc., and we had a partially used, aging box of wine (don't judge us) that was either going to be thrown away or used for cooking. So we decided to try our hand at vinegar making!
This was a really easy make. We started by gathering our materials: the aforementioned box o'wine, some apple cider vinegar with live "mother", and a clean 1 quart mason jar.:


This was a really easy make. We started by gathering our materials: the aforementioned box o'wine, some apple cider vinegar with live "mother", and a clean 1 quart mason jar.:

We then decanted (deboxed?) the wine into the mason jar:

Next, we added a splash of the unpasteurized, "live" apple cider vinegar:

We then placed a paper towel over the vinegar-to-be, and placed it in the cupboard:

In a few weeks/months, we should have either vinegar, or the cure for the common cold! :)
Make 11: Kombucha
Wow. It seems like I was just here! Tempus fugit... Anyway, this post is all about a make that has been weeks in progress, and still isn't quite ready. Still, here ya go: kombucha!


Kombucha is a fermented tea beverage that is purported to have health benefits due to its probiotic content. While I am not sure about the health benefits, I can tell you that it's tasty, and a healthful alternative to soda. In fact, I've even seen it marketed as "natural soda."
I tried kombucha for the first time several months ago, and I was immediately hooked. Once you get past the odor, which is somewhat earthy and vinegar-like, the taste is amazing. It is more tart than sweet, and has a pleasing effervescence. This is due to the fermentation of the sugars in the sweet tea starter by the "mother," which is a symbiotic culture of bacteria and yeast. This SCOBY, as it is also sometimes called, it the means by which sweetened tea is turned into kombucha. This tea is sometimes flavored with fruit juices or spices as well. My favorite thus far has been ginger kombucha, which adds a bit of heat from the ginger to the tartness.
So, after sampling kombucha, Rachelle and I decided to make it at home. After our successful attempts at home fermented foods earlier this year, such as sauerkraut and pickles, we felt pretty confident in our ability to do so. Also, I have made quite a bit of beer in the past (and plan to do so again in the future), so fermenting beverages is an old past-time of mine.
We started with a bottle of commercially available kombucha, which was delicious, and left about one-third of the bottle, which included the bacteria and yeast. This was to form the basis of the mother. We started with approximately 1cup of tea, with 2 tablespoons of sugar added, that was boiled, and then cooled to room temperature. To this cooled tea, we added the remnants of the bottle of kombucha. This sat in a jar, covered with a paper towel, in a dark cupboard for approximately 1 week.
After a week, we transferred this mixture to a larger container, and added it to a quart of tea, with 1/3 cup of sugar. This we also covered tightly, and placed back in the cupboard, where it sat for another 2-3 weeks. We checked it periodically, and when the mother had formed a mat approximately 1/4 inch thick, we were ready to make the kombucha proper!
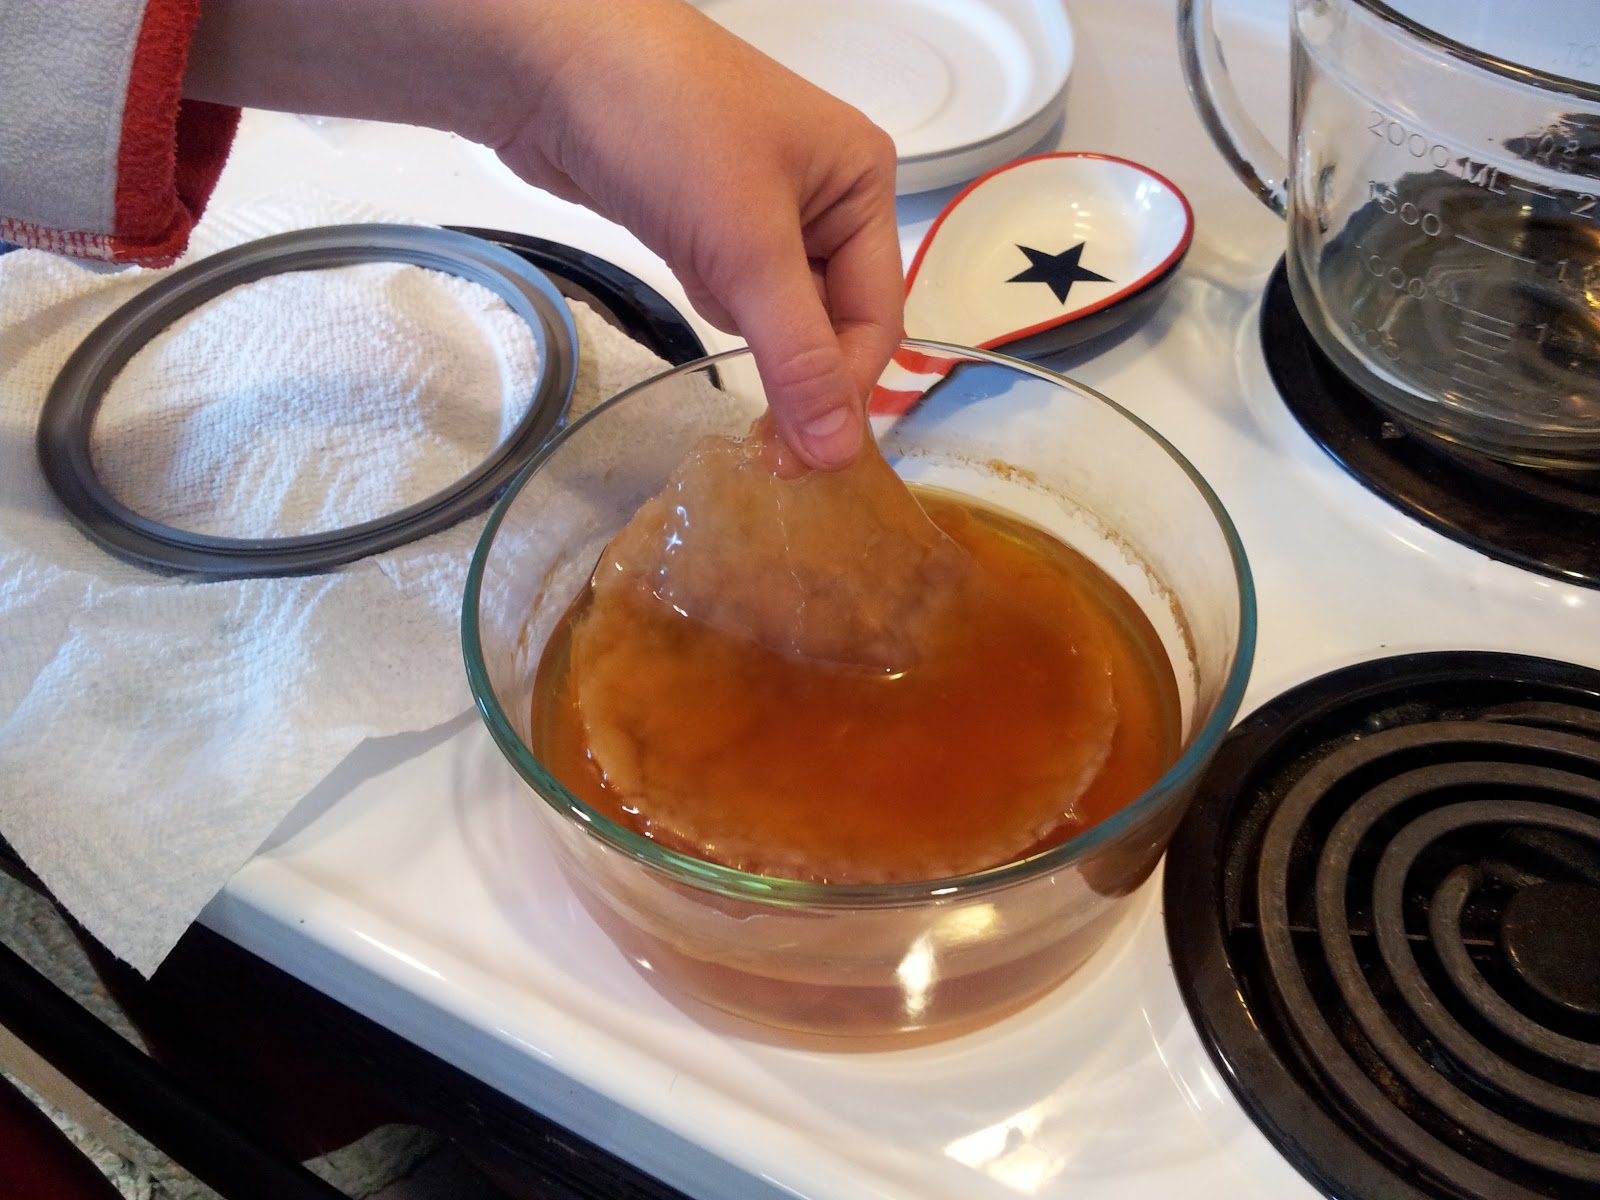
We took this mother and added it to 3 quarts of tea (made with 4 teabags and 1 cup of sugar) that had cooled to room temperature.

We added a cup or so of the liquid the mother had been growing in as well, and put all of this in a 2 gallon food-grade bucket, which we covered with a clean cloth.

This is now sitting in the cupboard, fermenting, and waiting to be bottled and consumed. We will be able to do that this week, and I will post an update when we do. I can't wait!
Next make: red wine vinegar.
Make 10: Bindrune Pendant
Although
I haven’t been posting, I have definitely been making. Chaotic work
and home schedules have made it difficult for me to put the time into
blogging about the various things I have been making. But no more! As
of today, I am catching up, and, will post about three, count ‘em
THREE, different makes, including this first one. Behold: the
bindrune pendant!
Bindrunes
are an ancient tradition, wherein 2 or more runes are combined in
such a way as to signify something-protection, power, etc. They are
also used to connect names, whether an individuals names, or the
names of 2 or more individuals. Runes are, for those of you who don’t
know, an ancient writing system, most closely associated with the
cultures and peoples of the North- Norsemen, Anglo-Saxons, Danes,
etc- although some of the oldest runic inscriptions have actually
been found in Italy. Those of you familiar with the works of J.R.R.Tolkien (and if you’ve made it this far, I’m going to assume you
are a huge nerd, and, therefore, familiar with his works) will
probably also know something of runes, albeit in an altered form.
Folks (heh, inside joke) who practice Asatru or other
Reconstructionist religious traditions also use runes in ritual
practices, and assign meaning beyond the sound or name to each one.
Keep this in mind as we move forward. Another modern use , as well as
being a bindrune, too, is the universal symbol for Bluetooth, which
is a combination of the runes Hagalaz
and
Berkano,
the initials of the Danish king and viking, Harald Bluetooth, for whom
the ubiquitious technology is named.

So,
my make for this week was a bindrune. I chose to use the runes that
corresponded with the first letter of both mine and Rachelle’s
names. For me, Gebo
,
corresponding
with G, and for Rachelle, Raidho
,
corresponding with R. Together, these to runes create a bindrune
that, in addition to looking cool, has meanings, both personal and,
if one is so inclined, protective and spiritual.
Before
we get into the meanings, let's first talk about how I created the
pendant with the bindrune on it. I used a variety of tools and
materials, but nothing terribly complicated, I started with a a tile
of wood, approximately 1 inch square, and, using a Dremel tool,
shaped this into a teardrop/oval pendant. On this, I marked the
design of the bindrune with a pencil. Using this drawing as a
template, I used a woodburner to engrave the bindrune into the wood.
I then drilled a hole in the top of the pendant, through which I
could string a length of leather cord, so as to make it a necklace.
Before I added the cord, I stained the pendant with olive oil, to
protect it, and to bring out some of the grain of the wood. The
finished product looks like this:

But
what does it mean? Well, there are a couple of ways in which one
could look at this pendant, and derive meaning. The most obvious is
simply the joining of the runes Gebo and Raidho, which reflects the
joining of Rachelle and myself. This is an accurate meaning, but not
a complete one. As I mentioned earlier, bindrunes often have a
hidden, or esoteric meaning as well. In this case, let's look at the
meanings ascribed to the 2 runes used. Gebo corresponds with the
words in the old Germanic languages for “gift,” and in modern
interpretations, is understood to refer to a relationship based on
recoprocity, both giving and receiving. Raidho corresponds with
various words in the old Germanic languages for “riding,”
especially as it relates to horses. (Sidenote: horses and horseriding
are key components of Proto-Indo-European culture and ritual, out of
which the Germanic traditions came. For more information, read
Mallory's excellent “In Search of the Indo-Europeans.”). In
modern interpretations, Raidho is understood to be connected to
moving, and journeying. (FYI, my reference for these meanings, both ancient and modern, is "Taking Up The Runes," by Diana L Paxson. Diana, in addition to being an outstanding author of numerous fantasy and historical fiction novels, is one of the preeminent practitioners of runelore alive today.)
One
possible interpretation of the bindrune created by joining Gebo and
Raidho then, is of a relationship moving forward, and based on
reciprocity. I think this is an excellent way of understanding and
thinking about a relationship, and I like the implications for the
relationship Rachelle and I are in.
So,
what about you? If you created a bindrune for you and your partner,
what would it be? What would it mean? What would a bindrune using
your initials be, and would would it mean?
Next
make: kombucha!
Tuesday, March 6, 2012
Make 9: Knittin' Ain't Easy
I know, I know. It's been well over a week since I posted my last make. What can I say? Frankly, I'm surprised that I made it to the end of February without slacking off. I haven't actually been slacking off (well, not much). I have been busy, and I have gotten some making done. I enjoyed making the hat for my son that I decided to try my hand at some more knitting. Behold! The scarf!

This was made on a smaller knitting loom, but of the same yarn as the hat. Actually, I think it came out better than the hat, and I am already working on another one. I gave this one to Rachelle, as she was headed off to Fairbanks for the week. I think it looked very pretty on her! :)
I was not the only maker this week, no sir. Rachelle, who is much craftier than I, and much handier in the kitchen, made an incredible braided, challah-like bread this weekend. It was made of three different doughs, so it looked, and tasted, great. We used one loaf for french toast, and the other has been great with butter and jam. Here are the two loaves fresh from the oven:

See? Don't they look great? Told ya! Now, stay tuned for another post later this week, as I play catch up...
Tuesday, February 28, 2012
Sunday, February 19, 2012
Vodka Update
I finally had a chance to bottle the ginger-infused vodka today. I poured it out of the mason jar through a sieve, and then into the bottles through a tea strainer. The end result:
.JPG)
.JPG)
As you can see, I ended up with 1.5 bottles. The bottles I used were glass bottles that were from kombucha purchased at the store. (Spoiler: expect to read about homemade kombucha as some point in the next few weeks). I did sample the vodka, and it was really good! It was gingery, but with just a hint of heat. The flavor of ginger definitely came through, though. It is now in the freezer, getting ice cold, and waiting to be drunk neat, or in a tasty cocktail. Recipe suggestions,anyone?
Make 8: Knitter Please!
Knitting! It's not just for ladies anymore! My project this week was a knit hat, or tuke for my Canadian friends. I have actually been thinking about this for awhile, and when at the craft store looking for materials and inspiration, I stumbled across a set of knitting looms. These looked so easy, that even a completely non-handy person like myself could give knitting a go.
Now some of you are probably saying to yourselves "But isn't knitting for the ladies?" First, I would encourage you to let go of outdated gender stereotypes and roles. Second, I would ask you to consider what, at it's core, is knitting? It's taking yarn and tying knots in it. Using the same gender stereotypes that I am encouraging you to abandon, it seems to me that tying knots in cordage is pretty damn manly! In fact, there's even a documentary that claims that not only is knitting a manly endeavor, it was men who first started knitting (think fishnets, etc) and that in traditional societies, knitting was always men's work.
Putting aside such debates, though, it is true that the majority of knitters these days are women. Still, Why shouldn't anyone, regardless of gender, have an opportunity to try their hand at knitting? That is precisely what I set out to do.
My materials for this week's make were very simple: Yarn, knitting loom, and a knitting needle:
.JPG)
I then started by making loops on each peg of the loom. I made a second set of loops, then started using the needle to pull the bottom loop over the top loop. At first, I wasn't sure what I was doing, but I seemed to be following the instructions, and eventually, I had something that looked like this (not on the same loom, but the same yarn, etc.):
.JPG)
I kept doing this for quite a while, although not nearly as long as I thought it would take, After making a brim and closing up the top of the hat, here is is the final product:

My son, Dylan, was kind enough to model the finished hat, which suited him so well, I gave it to him, Here are a couple of photos of him with it on:


I'm now working on a scarf from the same yarn (as seen above on the green loom). I am pretty sure I will be knitting some more, as I really like the hat I made, and want one for myself! I also find the whole process of knitting relaxing, and, as a fidgety person, having something to do with my hands while sitting is a godsend. Now, what should I make for next week...
Monday, February 13, 2012
Make 7: Ginger-Infused Vodka
I like booze. Good booze, that is. As a graduate student in Arizona, I had a professor who had a very good single-malt scotch collection. I developed a taste for scotch far beyond my means at the time, although I now have a reasonable good collection of my own. But my enjoyment of spirits is not limited to scotch and whiskey. I also enjoy vodka, gin, etc. A nice cold bottle of vodka in the freezer is a wonderful thing, and a toast with friends is something I cherish.
.JPG)


Last year, our friends Melissa and Brett had us over for dinner. In addition to other delicious goodies, they had some homemade cilantro-infused vodka. It was delicious! So, I'm going with this principle, and making my own ginger-infused vodka.
I started with a bottle of vodka. I didn't buy top-shelf stuff, but it was a decent vodka from somewhere in the middle of the shelf. Here is it with the ginger root I purchased for this purpose:
.JPG)
I cut about a 2 inch length of ginger root, peeled it, and sliced it up:

This I put into a quart mason jar, and poured the vodka over it:

I'll let this sit for a for a few days, and then I'll strain it, and pour it into 2-3 smaller bottles. I have high hopes for this! I'll post more pics as the process continues...
Sunday, February 5, 2012
Make 6: Catapult!
So here's the thing: I wasn't sure about this week's make, for a couple of reasons. First, it's a kit, and I struggled with the idea of using a kit to make something, or make something from scratch. Second, it technically wasn't even my kit, as I had bought it for my son for Christmas. I decided to go through with this make because it is practice for making something similar (and bigger) later in the year (expect a summertime catapult or trebuchet) and my son has shown zero interest in the kit himself. Besides, I really wanted to make this! What is it? A tabletop catapult, of course!
I have long been fascinated by all manner of large-scale pre-gunpowder weapons. The Greeks, Romans, and Chinese all had some version of a tension/torsion weapon, and all were deadly. Shows such as Mythbusters and Deadliest Warrior have recreated some of these weapons, and the sublimely absurd Punkin' Chunkin' takes the process and physics of such weapons to ridiculous new heights. Still, all of these devices are designed to do basically the same thing: launch a stone, bolt, flaming ball of pitch, or, well, pumpkin, as far as possible, with as accurate a shot a possible. Sounds simple right? It's not. In fact, the physics and logistics of such devices are surprisingly complicated.
Now my little tabletop catapult is not a weapon by any means, and its accuracy and power are limited. Still, the principles of operations that it uses are the same as the large devices, and let's face it: launching a ball of tinfoil across the room is fun! So let's get started, shall we?


The kit I used for this Make was purchased at Barnes & Noble, and included a great book by William Gurstelle. A quick Googling of Mr. Gurstelle reveals that he has written quite a few books on backyard siege engines, and the book that actually came with the kit was both informative and entertaining. The book, along with the pieces of the kit, are pictured here:

The actual build was pretty simple, and only took a few minutes. First, the frame was assembled:


The actual build was pretty simple, and only took a few minutes. First, the frame was assembled:

Then, the strings, which create the torsion, were threaded through the base of the frame:

Finally, the arm of the catapult was inserted into the torsion strings, and the strings were turned to create the torsion necessary to launch the ballistics material, er, tinfoil ball:


Finally, the arm of the catapult was inserted into the torsion strings, and the strings were turned to create the torsion necessary to launch the ballistics material, er, tinfoil ball:

That's it! With this lovely tabletop device, I was able to launch a ball of foil across the dining room and living room. If only I could take this to work...
So that's it this week. Nothing fancy, but I had fun! Tune in next time to see what I make!
Sunday, January 29, 2012
Sauerkraut 2.0
So, we sampled and jarred up our second batch of sauerkraut tonight. It is definitely more like traditional sauerkraut, with a distinctive tangy flavor. Also, we fermented it in the same container, the Perfect Pickler, that we made pickles in last week, and even though we had washed the container out, there was a residual bit of garlic, peppers and dill, which you can just taste in the new batch of sauerkraut. Not that that's a bad thing! Anyway, we ended up with just over 2 quarts from this batch. We've got about half a quart left from the first batch, so the timing is good! I look forward to starting another batch soon!
.JPG)
.JPG)
Make 5: Duct Tape Wallet
Oh, duct tape! Is there anything you can't do? Here in Alaska, duct tape is practically a natural resource. I am willing to bet that at any given time, there is a giant roll of duct tape in every household in the state. We use it for everything up here. I've seen boots that were more duct tape than leather, cars seemingly held together with nothing more than duct tape and wishes, and I've even used duct tape as a bandage after slicing my finger on a fillet knife while processing salmon on the Kenai River. I think the best use of duct tape I've seen is an old pickup truck, "painted" completely with hot pink duct tape. Oh yeah, we even use it to occasionally repair duct work!
Duct tape also has a long and proud history in the tool kits of do-it-yourselfers and makers, as is evidenced by the many duct tape projects on instructables.com and wikihow.com. It was on the latter that I found the basic instructions for this week's project, a duct tape wallet.
I've been wanting to make things for family and friends as a part of the Make A Week project, and so I decided that this week's duct tape wallet would be for my son, Dylan.

If you don't know my son, let me tell you a little bit about him. Dylan is 17 years old, and has Asperger Syndrome, an Autism Spectrum Disorder. He is exceptionally bright, and can talk to you (or at you, it sometimes seems) about topics ranging from linguistics to quantum physics. However, he rarely, if ever, reads social cues. He frequently has to ask "are you joking?" when you are obviously kidding. He really can't tell. He also is, well, unusual. He is unlike a typical teenager in many ways. He has no interest in driving, no interest in dating, and no interest in doing typical social things. This includes dealing with money. He has little interest in money, and will frequently forget the $10 and $20 bills that come tucked in to birthday cards. One result of this complete disinterest in money is that he doesn't have a wallet. A cool, hand-made duct tape wallet is just the thing!
I asked Dylan what color wallet he wanted. I have classic gray, black, and tie-dye patterned duct tape. He chose tie-dye, so that's what we worked with. I started the wallet by going to these instructions. I followed them, mostly, with a few minor deviations.
I started with my materials: a roll of tie-dye duct tape, scissors, a cutting board, and a tape measure.

.JPG)
I then folded this over, and made the first recognizably wallet-shaped thing.
.JPG)
.JPG)

Duct tape also has a long and proud history in the tool kits of do-it-yourselfers and makers, as is evidenced by the many duct tape projects on instructables.com and wikihow.com. It was on the latter that I found the basic instructions for this week's project, a duct tape wallet.
I've been wanting to make things for family and friends as a part of the Make A Week project, and so I decided that this week's duct tape wallet would be for my son, Dylan.

If you don't know my son, let me tell you a little bit about him. Dylan is 17 years old, and has Asperger Syndrome, an Autism Spectrum Disorder. He is exceptionally bright, and can talk to you (or at you, it sometimes seems) about topics ranging from linguistics to quantum physics. However, he rarely, if ever, reads social cues. He frequently has to ask "are you joking?" when you are obviously kidding. He really can't tell. He also is, well, unusual. He is unlike a typical teenager in many ways. He has no interest in driving, no interest in dating, and no interest in doing typical social things. This includes dealing with money. He has little interest in money, and will frequently forget the $10 and $20 bills that come tucked in to birthday cards. One result of this complete disinterest in money is that he doesn't have a wallet. A cool, hand-made duct tape wallet is just the thing!
I asked Dylan what color wallet he wanted. I have classic gray, black, and tie-dye patterned duct tape. He chose tie-dye, so that's what we worked with. I started the wallet by going to these instructions. I followed them, mostly, with a few minor deviations.
I started with my materials: a roll of tie-dye duct tape, scissors, a cutting board, and a tape measure.

I then started to make the first piece of the wallet, a sheet of fabric, more or less, made of duct tape, stuck sticky side to sticky side. This was cut down to approximately 7 in by 10 in.
.JPG)
.JPG)
From here, things moved very quickly. I made 2 more, smaller squares of duct-tape fabric to form the pockets in the wallet. These were taped in, and then I added 2 decorative and supportive strips of black duct tape to each end of the wallet. Here's the finished product:
.JPG)
And here:

So, there you go! I actually really liked the wallet I made for Dylan, and may make one for myself, too. It's super easy, and looks pretty good!
Sunday, January 22, 2012
Make 4: Switchel
One of my goals in doing the Make A Week project is to try to make and do things I haven't done before. There are so many things that I want to try that it is already becoming difficult to narrow things down, or even keep my projects to just one a week. Just this week, for example, we made:


We had several delicious homemade meals, and Rachelle also made an all-natural cleaning solution of one part water, one part vinegar. I made an extremely ghetto draining rack for our sprout jar, modeled on one we saw at the store that cost about $30 (mine was made of a wire coat-hanger, an aluminum pie tin, and, of course, duct tape!). I guess what I'm trying to say is that we are not going to be limited to one make each week. We'll have multiple makes, and some, like the sauerkraut, that will be ongoing. I will, however, highlight one particular project each week, and that one thing will usually be something I have either wanted to make for a long time, or some new (to me) project that I find intriguing. This week's make falls into the latter category: switchel.
- pickles

- another batch of sauerkraut (We've already gone through about half of the first batch)

- delicious homemade bread (That was all Rachelle. My baking prowess extends to toast, or, if I'm feeling adventurous, Pop-Tarts).

Now, I didn't know what this was either, until I was combing Making It for projects. Switchel is a variation on an extremely old drink made of honey and vinegar called oxymel. This combination has been used for thousands of years as a tonic and refreshing drink, and is, in many ways, a precursor to modern sports drinks. Switchel was popular in Colonial America, and was also known as Haymaker's Punch, as it was often served to those working in the hot sun while harvesting hay. It was usually made with a combination of molasses, vinegar, and ginger. I love honey, so I chose to modify this traditional recipe by including honey as well.
I started by getting the ingredients together: raw and unfiltered apple cider vinegar, molasses, honey, and ginger root.

I took 1 cup of vinegar, 1/2 cup of honey, and 1/2 cup of molasses and simmered it over low heat, just long enough to let the honey and molasses dissolve into the vinegar.

Once this had happened, I took 1-2 ounces of fresh sliced ginger (I didn't measure this out, I just guesstimated) and added it to the liquid. After simmering for a couple of minutes, I removed it from the heat, and let the ginger steep for another 15 minutes.


Once this had happened, I took 1-2 ounces of fresh sliced ginger (I didn't measure this out, I just guesstimated) and added it to the liquid. After simmering for a couple of minutes, I removed it from the heat, and let the ginger steep for another 15 minutes.

After 15 minutes, I strained the ginger out of the liquid, and poured the switchel into 3 half pint jars, with 2 being completely full, and one almost full.

These I then placed in the fridge to cool. Of course I needed to sample the finished product. I filled a pint glass with cold, filtered water, and added 3 teaspoons of the switchel mixture. It was sweet, tart, and had just a hint of heat from the ginger.

Now, whenever I want, I'll then be able to take 2-3 spoonfuls, mix it with cold water, and have a refreshing beverage that has no additives, no preservatives, and no weird, unpronounceable chemical ingredients. Plus, it's delicious!
Monday, January 16, 2012
Sauerkraut Update 3
Success! We have delicious, homemade sauerkraut after only two weeks! Last night, we tested the sauerkraut, and it was wonderful-salty, tangy, crispy- and an incredible color. Here's the finished product:


As you can see, we ended up with two quarts of the stuff, both of which are now in the fridge. We had some with lunch today, and it was fantastic. I will definitely be making more sauerkraut, and experimenting with it to see what other variations I can come up with.
Make 3: PVC Didgeridoo
I've been a musician all my life. I remember singing in church as young as 3, and have been playing piano, guitar, and various other instruments for a long time. I won't say that I play anything with great skill or expertise, but I enjoy making music, and always have. Once, many years ago, my first major in college was Vocal Performance, and I sang in various operas and musicals during that time.
While that's been some time, I continue to enjoy making music. Over the years, I have taught myself to play, or at least make some noises with, a variety of instruments. One of my favorites is the didgeridoo. I purchased my first one back in the '90s, at a music store in the Haight-Ashbury district of San Francisco. It was made of PVC, and I loved it. I've purchased others throughout the years, and have a couple made of bamboo and agave. I also have a traditional eucalyptus didgeridoo that was given to me by a friend from Australia. It's a lovely thing, but I have always found the tone and timbre of my original PVC didgeridoo to be my favorite. So, that is what I am making this week: a PVC didgeridoo, Alaskan style.
For those of you who don't know, the didgeridoo is one of the oldest instruments in the world. The Aboriginal people of Australia have been playing it for thousands of years. It is a drone instrument, and has a haunting, ancient sound. Actually, to call the didgeridoo a drone instrument is a little bit misleading, since one of the things that makes it so unique is the amazing ability to make a variety of sounds with the instrument. Very similar instruments from the Bronze Age have been discovered in Ireland, and produce similar drone effects. In fact, it is not unusual to find the didgeridoo paired with the other, more famous Celtic drone instrument, the bagpipes. One of my favorite bands, The Wicked Tinkers, incorporate the didgeridoo, the ancient Irish bronze horn, and the Highland bagpipes, creating a style of music they call Tribal Celtic.
But back to my much less traditional, much more modern version of the didgeridoo. PVC is probably the most easily attainable material for someone who wants to make a didgeridoo. I picked up everything I needed to make two didgeridoos at Home Depot for around fifteen dollars. I looked up a variety of instructions on instructables.com, wikihow.com, and various other sites around the web. My make doesn't follow any one set of instructions, but is a combination of several ideas, with a special Alaskan addition.
My materials to make one didgeridoo were:
- approx. 5 feet of 1.5 inch diameter PVC pipe

- 1 female-female 1.5 inch coupler
- 1 1.5 inch to 1 inch bushing

- a lump of beeswax ( I forgot to take a picture before I used it, so use your imagination)
- duct tape! (The secret Alaskan ingredient)

Assembly is fairly easy. You attach to coupler to the pipe, attache the bushing to the coupler, and, if one were super lazy, you could stop right there. I chose to prettify my didgeridoo by wrapping it first with black duct tape, then adding stripes of tie-dye patterned duct tape. I then molded a mouthpiece with the beeswax (the only traditional part of this didgeridoo) for a better seal when playing. Here's the finished product, and a close-up of the beeswax mouthpiece:


Now, I will be the first to admit that this is not the world's best didgeridoo. It is by no means going to produce the same sounds as a traditional didgeridoo. But, it was fun to make, fun to play, and, if I do say so, looks kinda cool!
Sunday, January 8, 2012
Sauerkraut Update 2
We checked on the sauerkraut last night to see how it was coming along. There were a few tiny spots of mold growing on the surface of the liquid, but nothing significant. Once these were scraped off, we removed the plastic plate covering the sauerkraut, and had a look at the stuff itself. It looked great! The color was fantastic, a beautiful ruby color as a result of the combination of red and green cabbage. We tasted it as well, and it was delicious, but not quite done fermenting. We put lid back on, and will just let it it sit for a bit longer. Once its ready, we'll let you know!
Make 2: Paracord Bracelet

Anybody who knows me knows that I am a gadget geek. I love all sorts of gadgets, and have a collection to prove it. My definition of gadget is somewhat expansive, and doesn't just mean a new shiny electronic toy. It can mean a new multitiool, or knife, or backpack, or anything that if functional and cool. This goes back a long way, to the days I was a Boy Scout, and loved collecting camping gear, from terribly cheap "Rambo" knives to can openers you wear on a chain. My latest make harkens back to these childhood obsessions, and is also useful, functional, and, I daresay, attractive. Behold: the paracord bracelet!
I have been thinking about making a paracord bracelet for some time, ever since reading the instructions for making one in The Best of Instructables Volume I, a collection of some of the best projects for DIY-ers and hobbyists from the amazing website Instructables.com. If you're not familiar with Instructables, then I highly recommend checking it out. There are instructions for making and doing practically anything, and I plan on mining the site for future projects for the Make A Week project. But I digress. This week's make was a paracord bracelet. This is a really useful piece of gear that, in an emergency or survival situation, could supply you with approximately 6 feet of 550 paracord. If you don't know what paracord is, look here. In short, it's super tough, super useful cordage, that has a wide variety of applications in the outdoors. The bracelet is a handy way of carrying a decent amount of this useful gear with you at all times.
The first order of business for this project was to procure paracord. After looking at a couple of general merchandise and hardware stores, during the week, I came up empty handed. So, on Saturday I made my way to Sportman's Warehouse, an enormous store catering to outdoors enthusiasts. Think of it as the Red State version of REI. I knew that they would have it in stock. I was able to pick up 100 ft. of paracord for approx. $7 (a pre-made bracelet of the same style was available for $10.99). I was also looking for a side-release buckle for the bracelet, but they were out of stock of the appropriate size. This wasn't a big deal, since there are other styles of bracelet that use knots and loops to attach it to the wrist.
Once home and settled, I started looking up various plans for the bracelet style I wanted to make. After combing Instructables.com and Youtube, I had a general idea of how to make it. You start with a loop, made of a length of paracord that is equal to 2 times the circumference of your wrist:
 |
| The first step |
 |
| All the stuff |
Here's the completed bracelet, on its own, and on my wrist:

 |
| Awesome! |
So there you go! A simple make, and one that's potentially useful. Plus, I think it looks pretty great, too! I have materials to make plenty more, which I probably will, now that I know how easy it is. So, what do you think?
Bonus Make: Reusable Dryer Sheets
Several months ago, Rachelle bought a great book at our local used bookstore, Title Wave. Her excellent score was The Big-Ass Book of Crafts. This book has dozens of cool, funky craft ideas, from the whimsical to the practical, and reusable dryer sheets definitely fall into the latter. The instructions are pretty simple. Take some cloth, cut it into 8 inch squares (or thereabouts) with pinking shears. Wash the squares. Take liquid fabric softener and put it in a spray bottle. When you're ready to use the dryer, take a fabric square, and spray it 6-8 times with fabric softener, then toss this in the dryer. No pictures (the squares are in the dryer), but you get the idea. Easy, simple, and green.
Several months ago, Rachelle bought a great book at our local used bookstore, Title Wave. Her excellent score was The Big-Ass Book of Crafts. This book has dozens of cool, funky craft ideas, from the whimsical to the practical, and reusable dryer sheets definitely fall into the latter. The instructions are pretty simple. Take some cloth, cut it into 8 inch squares (or thereabouts) with pinking shears. Wash the squares. Take liquid fabric softener and put it in a spray bottle. When you're ready to use the dryer, take a fabric square, and spray it 6-8 times with fabric softener, then toss this in the dryer. No pictures (the squares are in the dryer), but you get the idea. Easy, simple, and green.
Subscribe to:
Posts (Atom)